+ Reply to Thread
Page 1 of 8 12345678 LastLast
Results 1 to 10 of 80

Thread: My homemade arch project

  1. #1
    Join Date
    Feb 2017
    Location
    Richmond NH
    Posts
    313

    Default My homemade arch project

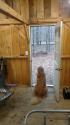
    Just thought Id share my progress on my arch build so far. Got the whole frame done with 2x2 1/8 angle iron. Im using 16ga to skin the sides. I have 2 pieces of 1/4 angle to hold up the bar stock im using for grates. Its 1 inch solid bar stock I got for free from work. They are spaced 1/2 inch apart. Im planning to use a small squirrel cage blower i have for AUF. So far all Ive bought was the sheet of 16ga for $70. Oh and the amazing smoky lake 2x4 hybrid pan! Cant wait to fire it up. Should be a huge improvment over the barrel stove from last year!
    IMG_20180819_164028187_zpsbtffli6t.jpg
    IMG_20180819_164106870_zps1ghajbeq.jpg
    IMG_20180819_164050030_zpsbtkudebw.jpg
    IMG_20180819_164326796_zps37ssopj9.jpg
    Jake
    smoky lake 2x6 drop flue SSR on homemade arch
    235 taps on 2 gast 1550s and lappiere releasers
    24x12 sugar house
    2019 Kubota L2501 work horse

  2. #2
    Join Date
    Feb 2017
    Location
    Richmond NH
    Posts
    313

    Default

    The sides are just tacked in place right now. Im going to stitch weld them. My thinking was once the ceramic blanket and brick is in there it should be pretty close to air tight so i shouldnt have to weld all the way around. Is that going to be a problem?
    Jake
    smoky lake 2x6 drop flue SSR on homemade arch
    235 taps on 2 gast 1550s and lappiere releasers
    24x12 sugar house
    2019 Kubota L2501 work horse

  3. #3
    Join Date
    Feb 2017
    Location
    Richmond NH
    Posts
    313

    Default

    Couple more pictures...
    IMG_20180819_192725958_zpseirlteiu.jpg
    IMG_20180819_192746040_zpsoy4ry7tf.jpg

    Im going to have to cut out the back of the top rail so the pan can sit all the way back. The flues go right to the back of the pan. I was thinking about welding a piece of angle with the lip facing up so the pan can sit up against it at the very back.
    IMG_20180819_192737778_zps69yt4cr8.jpg
    Jake
    smoky lake 2x6 drop flue SSR on homemade arch
    235 taps on 2 gast 1550s and lappiere releasers
    24x12 sugar house
    2019 Kubota L2501 work horse

  4. #4
    Join Date
    Feb 2012
    Location
    Fond du Lac, Wisconsin
    Posts
    1,086

    Default

    Looks good and the enthusiasm you show is a reminder of why most of if not all of us started doing this. Keep the pictures and posts coming.
    Smoky Lake 2x6 dropflu pans and hoods on homemade arch
    Smoky Lake 6 gallon water jacked bottler
    Concentric Exhaust
    250 Deer Run RO
    325 taps

  5. #5
    Haynes Forest Products Guest

    Default

    Do not fully weld the sides you will turn the side into a warped mess. Having some air infiltration from the small gaps on the side will not have any effect. Small stitch welds id better than fully welding.

  6. #6
    Join Date
    Feb 2017
    Location
    Richmond NH
    Posts
    313

    Default

    Thanks guys. Once the skin is welded on I'm going to start working on the exhaust outlet. How much space do I need between the back of the pan and the base stack? Also does anyone know the dimensions of the bottom (large) opening of a stainless 8 inch base stack? Are they all the same? I need to make a trip to bascoms but haven't had the time as of late.
    Jake
    smoky lake 2x6 drop flue SSR on homemade arch
    235 taps on 2 gast 1550s and lappiere releasers
    24x12 sugar house
    2019 Kubota L2501 work horse

  7. #7
    Join Date
    Feb 2017
    Location
    Richmond NH
    Posts
    313

    Default

    Made a little more progress after work today. Got the back panel of the fire box welded in along with stitch welding the sides in for good. Also got the grates done. I think im going to tack the solid rods to the support so they dont move while im tending to the fire box. In retrospect i should have put the supports in farther so the shafts could sit in farther. As they are now the supports are right at the end of the shafts. I left 3 1/4 inches on each side to allow for 1 inch of ceramic blanket and 2 1/4 for a full fire brick, so i welded the support angle iron in 3 1/4 inches. Should have been more like 4. I decided to wait to do the exhaust part until i get a base stack so i can mock it up. The little craftsman 110 welder and angle grinder are getting quite the workout! So far they are performing admirably ☺
    IMG_20180822_184930713_zpsdakne0m2.jpg
    IMG_20180822_185042374_zpstnm27kj8.jpg
    IMG_20180822_185031389_zps3c1kliya.jpg
    IMG_20180822_184939512_zpsk8mno0fy.jpg
    IMG_20180822_184947456_zpsuewbb9cf.jpg

    Im glad i just stitch welded the sides and didnt continuously weld them... would have taken hours and im sure they would be a wavy mess as Haynes stated before.
    Last edited by raptorfan85; 08-23-2018 at 05:53 AM.
    Jake
    smoky lake 2x6 drop flue SSR on homemade arch
    235 taps on 2 gast 1550s and lappiere releasers
    24x12 sugar house
    2019 Kubota L2501 work horse

  8. #8
    Join Date
    Feb 2017
    Location
    Richmond NH
    Posts
    313

    Default

    Got the door pretty much finished today. The door is 5/16 plate. I used some 1/4 angle iron for the hinges. It actually works a lot smoother than i was anticipating, despite the fact that it weighs probably close to 30 pounds! I know its over built but its what I had. The handle is just some rebar with a spacer welded to the end so it can pivot at the door end. Theres a flange bolt welded to the door and it will have a pinch lock nut to hold it snug but alow it to pivot up and down. The finished opening is 14high and 20 wide. I figured bigger would be better for loading wood.

    IMG_20180826_134809361_zps4d4sekof.jpg
    IMG_20180826_134800909_zpsgwc1scn8.jpg
    IMG_20180826_134749467_zps7lrp76e9.jpg

    The opening is angle iron and the door sits inside of it. With the ceramic blanket on it seals tight as a drum. Im really happy with how it came out.

    IMG_20180826_141608829_zpsuc3ruuoe.jpg
    IMG_20180826_134739351_zpser8vnxic.jpg

    Those bolts on the inside are 1/2 stainless to hold the ceramic blanket on. Its going to have 2 more layers on the inside that fit tightly with the brick, once thats in. Next thing on the list is a latch for the handle and the ash door. 2 rolls of welding wire down, onto the third!
    Last edited by raptorfan85; 08-26-2018 at 01:45 PM.
    Jake
    smoky lake 2x6 drop flue SSR on homemade arch
    235 taps on 2 gast 1550s and lappiere releasers
    24x12 sugar house
    2019 Kubota L2501 work horse

  9. #9
    Join Date
    Feb 2017
    Location
    Richmond NH
    Posts
    313

    Default

    This is the fan I was going to use for AUF. Its the power draft off an old coal stove I had. The only markings on it are for the motor itself... as far as i can tell its somewhere around 100cfm?

    IMG_20180826_141502093_zpsppurmoxy.jpg
    IMG_20180826_141507826_zpswymhouyn.jpg

    Is this going to be big enough? I guess my thinking was any air is better than none! I can always run it naturally aspirated with the ash door open, but I still think it will work better with the blower. Any thoughts?
    Jake
    smoky lake 2x6 drop flue SSR on homemade arch
    235 taps on 2 gast 1550s and lappiere releasers
    24x12 sugar house
    2019 Kubota L2501 work horse

  10. #10
    Haynes Forest Products Guest

    Default

    Draft induction fans are not as powerful as the type used for air injection. Yes it will make a difference in the combustion but not to the extent that you need. Blowing air thru restrictive nozzles takes a higher pressure blower.

+ Reply to Thread
Page 1 of 8 12345678 LastLast

Posting Permissions

  • You may not post new threads
  • You may not post replies
  • You may not post attachments
  • You may not edit your posts