+ Reply to Thread
Page 1 of 2 12 LastLast
Results 1 to 10 of 19

Thread: Mason 2x3 questions bricking & insulating

  1. #1
    Join Date
    Dec 2011
    Location
    Bedford, NH
    Posts
    139

    Default Mason 2x3 questions bricking & insulating

    Couple questions related to my new WF Mason 2x3 hobby evaporator. The forums are great and I am on informational overload from all my research and reading and from looking at the bricking info on the WF mason site so I am looking for opinions on the following:

    1. The 2x3 fire box is flat not stepped like the larger 2x4's. Should I step it up using bricks on the back half so that the back half of the bricks is at the same elevation of the bottom of the stack outlet?

    2. If I step up the back 1/2 of the evaporator can I use patio bricks to step it up with a layer of splits on top?

    3. Any reason why I can't brick the whole unit with splits or should I use full bricks on the bottom and splits for the rest?

    4. I have read a lot about insulating board that gets covered by splits in people's evaporators so they can insulate the arch so they can stand next to it. Should I be insulating with the board sold by Bascoms and covering with splits on the sides to help make it more bearable to stand aroun the evaporator?

    5. I will be boiling outside, no shack this year. For the stack which is 6" outlet on my evaporator any issues coming off with a 90-degree elbow and going up 6' using black stove pipe I have seen at the Tractor Supply? So I need a stack cover or can I leave it open ended?

    Thanks for your input in advance.
    2016-2018, 50 taps on hobby vacuum, boiling outdoors on the Mason 2x3.
    49 taps 2015, mix of hobby vacuum and gravity, boiling outdoors on the Mason 2x3.
    42+4 taps 2014, still on a WF Mason 2x3 Hobby Evaporator
    43 taps 2013 on a WF Mason 2x3 Hobby Evaporator
    10 taps 2012

    Follow along on our sugaring adventures at our website:
    http://littlecreekmaplefarm.com

  2. #2
    Join Date
    Jan 2012
    Location
    Durham, CT
    Posts
    104

    Default

    Here are some pics of my 2x3 Mason I bricked last year. I used blanket instead of board and used splits stood on their sides for support for the step up.

    finish brick2.jpgfinish brick.jpgblanket.jpg
    2024 55 3/16 gravity, 19 5/16 gravity, 40 buckets and bags, RO Bucket rb15 kit, 5ft Phaneuf drop flue evaporator, Mason AUF arch.
    2023 35 3/16 gravity, 30 5/16 gravity 53 buckets and bags, RO Bucket rb15 kit, 5ft Phaneuf drop flue evaporator.
    Mason AUF arch
    2022 35 3/16 gravity, 28 5/16 gravity, 50 buckets and bags, New RO Bucket rb15 kit.
    2021 11 on 5/16 gravity, 30 on 3/16 gravity, 69 on buckets and bags. All sugar maples. Mostly large old trees.

  3. #3
    Join Date
    Dec 2011
    Location
    Bedford, NH
    Posts
    139

    Default

    Those photos are excellent and are going to be very helpful for me thanks CT. I have Two more questions on your setup.

    How thick was the blanket you used, what product was it, and did it insulate well when you were boiling, could you stand next to the sides without discomfort?

    Also what did you use to create the step in the back all fire bricks built up the couple inches (never mind I just reread and saw that you used splits)

    Thanks again for your responses.
    2016-2018, 50 taps on hobby vacuum, boiling outdoors on the Mason 2x3.
    49 taps 2015, mix of hobby vacuum and gravity, boiling outdoors on the Mason 2x3.
    42+4 taps 2014, still on a WF Mason 2x3 Hobby Evaporator
    43 taps 2013 on a WF Mason 2x3 Hobby Evaporator
    10 taps 2012

    Follow along on our sugaring adventures at our website:
    http://littlecreekmaplefarm.com

  4. #4
    Join Date
    Jan 2012
    Location
    Durham, CT
    Posts
    104

    Default

    I just ordered the Arch paper from Bill up at WF Mason. He sent me the amount and thickness I needed. (arch paper 12sf @$5.=60. Last years price). Remember you just paper the fire box and not the step up. Make sure you plan out your cuts of the arch paper to get the most out of it. Worked great. If you have the blower, and you should, get a dimmer switch extension cord to plug it into, You can then regulate the blower and shut it off easily when you open the door to feed in more wood.
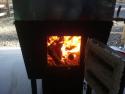
    setup.jpgboiling.jpg
    Last edited by CTfarm; 01-05-2013 at 07:44 AM.
    2024 55 3/16 gravity, 19 5/16 gravity, 40 buckets and bags, RO Bucket rb15 kit, 5ft Phaneuf drop flue evaporator, Mason AUF arch.
    2023 35 3/16 gravity, 30 5/16 gravity 53 buckets and bags, RO Bucket rb15 kit, 5ft Phaneuf drop flue evaporator.
    Mason AUF arch
    2022 35 3/16 gravity, 28 5/16 gravity, 50 buckets and bags, New RO Bucket rb15 kit.
    2021 11 on 5/16 gravity, 30 on 3/16 gravity, 69 on buckets and bags. All sugar maples. Mostly large old trees.

  5. #5
    Join Date
    Dec 2011
    Location
    Bedford, NH
    Posts
    139

    Default

    Great, thanks for your help. DId you ever run your 2x3 without the blower and do you have any info on your boil rates without the blower and with the blower? Just curious what to expect from someone who has teh same unit that I do.
    Thanks
    Bill
    2016-2018, 50 taps on hobby vacuum, boiling outdoors on the Mason 2x3.
    49 taps 2015, mix of hobby vacuum and gravity, boiling outdoors on the Mason 2x3.
    42+4 taps 2014, still on a WF Mason 2x3 Hobby Evaporator
    43 taps 2013 on a WF Mason 2x3 Hobby Evaporator
    10 taps 2012

    Follow along on our sugaring adventures at our website:
    http://littlecreekmaplefarm.com

  6. #6
    Join Date
    Mar 2011
    Location
    Broad Brook, Connecticut
    Posts
    540

    Default

    Hi Bill, when I asked Bill Mason about it last year he said it would add about 3 GPH. I think it added all of that and maybe more. It is a huge difference in steam and the violence of the boil. When I shut the blower down to fire it, it was very significant how quickly the boil slowed way down.

    One question I have that maybe Bill may come across as well.....I never cemented my fire brick in last year. I am planning to cement it this week and I have arch paper. Do I cement the back of the bricks to the arch paper or just place the bricks against the wall and cement the bricks to each other?
    2011-8 Taps on a very crude block arch
    2012- 38 taps 2 X 3 with blower.
    2013- 70 taps total-50 on tubing, 20 on buckets
    2014- 75 taps- Low vacuum, 2X4 drop flue
    2015- 100 taps-2X6 Mason Drop Tube, low vac
    2016-115 taps high vac, 60 taps buckets
    14X20 post and beam shack with attached 10X14 wood shed
    12 beehives and an avid waterfowl hunter.
    Wishing I can quit my day job, keep bees, farm, and make syrup!
    https://www.facebook.com/pages/Moshe...40072296064422

  7. #7
    Join Date
    Dec 2011
    Location
    Bedford, NH
    Posts
    139

    Default

    Just a quick update, I was at Bascom's yesterday to pick up some supplies for the upcoming season and after looking at insulating Arch board in person and based on the feedback from everyone I decided to buy and use the arch board in my evaporator. I appreciate all the help everyone has given me.
    2016-2018, 50 taps on hobby vacuum, boiling outdoors on the Mason 2x3.
    49 taps 2015, mix of hobby vacuum and gravity, boiling outdoors on the Mason 2x3.
    42+4 taps 2014, still on a WF Mason 2x3 Hobby Evaporator
    43 taps 2013 on a WF Mason 2x3 Hobby Evaporator
    10 taps 2012

    Follow along on our sugaring adventures at our website:
    http://littlecreekmaplefarm.com

  8. #8
    Join Date
    Sep 2012
    Location
    Dresden, ME
    Posts
    163

    Default

    Does anyone have a mason 2x3 with the squirrel cage blower? If so, could you send or post the specs etc from the label. I'd like to add one to mine.
    Thanks in advance.

  9. #9
    Join Date
    Dec 2011
    Location
    Bedford, NH
    Posts
    139

    Default

    Just a quick update, I have installed both the 1" arch board from Bascom's and the fire bricks (splits). I used about 6-1/2 pieces of the arch board and 56 bricks. Still need to figure out the stack, and due a test boil! Thanks again to those who have given me help or advice.

    Bricking the arch part 2 2013-01-13 027.jpgBricking the arch part 2 2013-01-13 030.jpg
    Last edited by bcarpenter; 01-13-2013 at 08:53 PM.
    2016-2018, 50 taps on hobby vacuum, boiling outdoors on the Mason 2x3.
    49 taps 2015, mix of hobby vacuum and gravity, boiling outdoors on the Mason 2x3.
    42+4 taps 2014, still on a WF Mason 2x3 Hobby Evaporator
    43 taps 2013 on a WF Mason 2x3 Hobby Evaporator
    10 taps 2012

    Follow along on our sugaring adventures at our website:
    http://littlecreekmaplefarm.com

  10. #10
    Join Date
    Apr 2010
    Location
    St Croix Falls WI
    Posts
    20

    Default

    Starting Small. We insulated then bricked our new mason cooker last year. i only cemented the outside of the brick not to the insulation.

+ Reply to Thread
Page 1 of 2 12 LastLast

Tags for this Thread

Posting Permissions

  • You may not post new threads
  • You may not post replies
  • You may not post attachments
  • You may not edit your posts